Struggling with slow internet or dead zones in your home? Setting up your Eero Mesh WiFi can be the game-changer you need.
Imagine seamless, fast WiFi that reaches every corner without interruptions. In this guide, you’ll discover simple, step-by-step instructions to get your Eero system up and running quickly. By the end, you’ll enjoy strong, reliable internet that keeps all your devices connected effortlessly.
Ready to boost your WiFi experience? Let’s dive in!
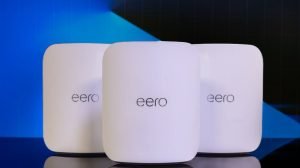
Choosing The Right Eero Kit
Setting up a strong wifi network starts with picking the right Eero kit. Your choice depends on your home and internet needs.
This guide explains key points to help you decide between different Eero options.
Single Router Vs Mesh System
A single Eero router covers small spaces well. For bigger homes, a mesh system is better. Mesh systems use multiple units to spread wifi evenly.
- Single router: good for apartments and small houses
- Mesh system: best for large homes and multiple floors
- Mesh units work together to reduce dead zones
- Single routers may struggle with obstacles and distance
Considering Home Size And Layout
Measure your home size and note the layout before choosing. Walls, floors, and furniture can block wifi signals.
| Home Size | Recommended Setup |
| Under 1,000 sq ft | Single Eero router |
| 1,000 to 2,500 sq ft | Mesh system with 2 units |
| Over 2,500 sq ft | Mesh system with 3 or more units |
| Multiple floors | Mesh system with units on each floor |
Eero Pro And Beacon Options
Eero offers Pro and Beacon devices for mesh networks. Pro units are more powerful. Beacons are smaller and plug into outlets.
- Eero Pro:Covers more area, faster speeds, good for main router
- Eero Beacon:Adds coverage, easy to place, good for extending network
- Mix Pro and Beacon units to fit your home needs

Credit: www.youtube.com
Preparing For Installation
Setting up your Eero mesh WiFi system starts with good preparation. This helps the installation go smoothly.
Before you begin, check your internet and get your devices ready. Follow these steps to prepare for the setup.
Checking Internet Connection
Make sure your internet service is active and working. You need a stable connection to set up Eero.
Test your internet by connecting a computer or phone directly to your modem. Open a website to see if it loads.
- If the site loads, your internet is ready.
- If it doesn’t load, restart your modem and try again.
- Contact your internet provider if problems continue.
Placing Your Primary Eero Router
Choose a central spot in your home for the main Eero router. This helps the WiFi signal reach all areas.
Keep the router away from thick walls and metal objects. Place it high up, like on a shelf or table.
- Near your modem for easy connection
- Open space without many obstructions
- Close to areas where you use WiFi most
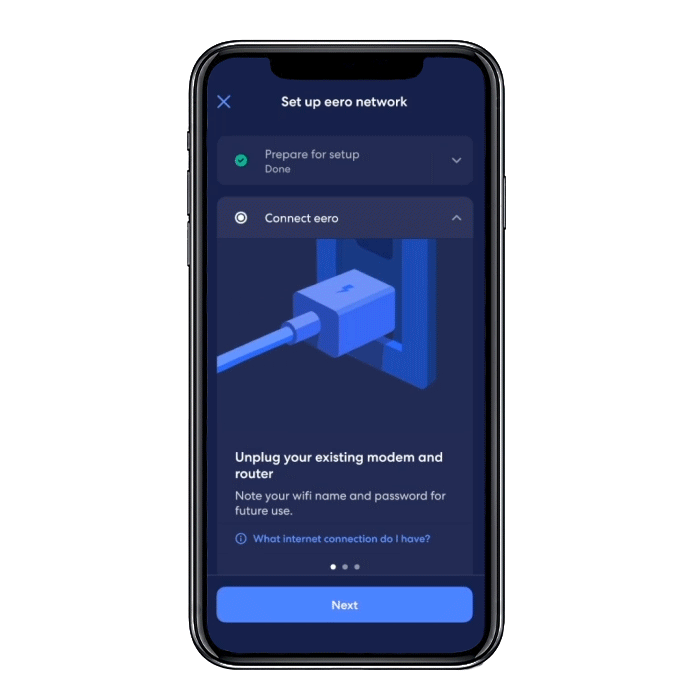
Downloading The Eero App
Download the Eero app on your smartphone or tablet. The app guides you through the installation process.
The app works on both iOS and Android devices. Search for “Eero” in your app store to find it.
- Open the app store on your device
- Search for “Eero”
- Download and install the app
- Create an account or log in if you already have one
Setting Up The Primary Eero Router
Setting up the primary Eero router is the first step to building your mesh WiFi network. This main router connects to your internet modem to share WiFi across your home.
Follow simple steps to connect and configure your Eero router for the best network experience.
Connecting To Modem
Start by unplugging your modem from power. Then connect the Eero router’s internet port to your modem using an Ethernet cable.
After connecting the cable, plug your modem back into power. Wait until it fully restarts before moving on.
Powering On And Syncing
Plug the Eero router into a power outlet. The LED light will start blinking, showing it is powering on.
Open the Eero app on your phone. Follow the instructions to sync your phone with the Eero router. This connects the router to the app.
- Plug in the Eero router
- Wait for the LED to blink blue
- Open the Eero app
- Follow sync prompts in the app
Configuring Network Settings
Use the Eero app to set your network name (SSID) and password. Choose a name that is easy to remember.
Set a strong password to keep your network secure. The app also lets you customize other settings like guest access and device management.
- Open the Eero app settings
- Enter your preferred network name
- Create a secure password
- Adjust additional settings as needed
Adding Additional Eero Units
Adding extra Eero units helps spread your WiFi signal through your whole home. This guide shows how to place and connect them correctly.
Follow these steps to ensure your additional Eero units work well with your main router.
Optimal Placement For Coverage
Place your extra Eero units where the signal from the main Eero is still strong. Avoid walls and metal objects that block WiFi.
- Put units in open spaces, like hallways or large rooms.
- Keep them at least 10 feet from the main Eero.
- Do not place units near microwaves or cordless phones.
- Try to place units at a height of 3 to 5 feet off the floor.
Syncing Secondary Eeros
After placing your new Eero units, you must sync them with your main Eero. Use the Eero app for a simple process.
- Open the Eero app and log in.
- Tap the “Add Eero” button.
- Follow the app’s instructions to find and add the new unit.
- Wait for the light on the new Eero to turn solid white, meaning it is connected.
Troubleshooting Connection Issues
Sometimes, additional Eero units may not connect properly. Check these common issues and fixes.
| Issue | Possible Cause | Fix |
| New Eero not syncing | Too far from main unit | Move closer and try again |
| Slow internet speed | Interference from devices | Change unit location |
| Unit light is red | Network error | Restart the Eero unit |
| App cannot find new Eero | App not updated | Update app and retry |
Optimizing Your Mesh Network
Setting up your Eero mesh WiFi is just the first step. You can improve your network’s performance and security by using its tools well.
Learn how to use the app features, manage device priorities, and set security controls. These tips help you get the best from your mesh system.
Using The Eero App Features
The Eero app lets you control your mesh network easily. Use it to check signal strength and find the best spots for your Eero units.
- Run speed tests to see your internet speed
- Check the status of each Eero device
- Set up guest WiFi for visitors
- Update firmware for better performance
Managing Devices And Priorities
You can control which devices get faster WiFi. This helps if many people use your network at once.
- Open the Eero app and go to Device Settings
- Select the device you want to prioritize
- Turn on “Priority Device” for faster speeds
- Adjust as needed when different devices require more bandwidth
Enabling Security And Parental Controls
The Eero system offers security features to keep your network safe. You can also set rules for kids’ internet use.
| Feature | Description | Benefit |
| Automatic Updates | Keeps software current | Protects against threats |
| Content Filtering | Blocks unwanted sites | Keeps kids safe online |
| Pause Internet | Stops internet on specific devices | Limits screen time |
Credit: support.eero.com
Maintaining And Updating Your Eero System
Keeping your Eero mesh Wi-Fi system updated ensures optimal performance. Regular maintenance is crucial for a stable network.
Follow these guidelines to maintain and update your Eero system effectively.
Firmware Updates
Firmware updates improve your Eero’s security and performance. Automatic updates are recommended.
- Enable automatic updates in the Eero app.
- Check the app for update notifications.
- Restart your Eero after updates for best results.
Regular Speed Tests
Regular speed tests help you monitor your internet connection’s performance. Use the Eero app to run tests easily.
| Test Type | Frequency |
| Download Speed | Weekly |
| Upload Speed | Weekly |
| Latency | Weekly |
Handling Network Interruptions
Network interruptions can be frustrating. Troubleshoot them with these simple steps.
Credit: support.eero.com
Frequently Asked Questions
What Is Eero Mesh Wifi And How Does It Work?
Eero Mesh Wifi is a system that uses multiple devices to spread wifi evenly. It improves coverage and removes dead zones in your home. Each Eero device connects to the main router and communicates to provide a seamless internet experience.
How Do I Set Up Eero Mesh Wifi Step-by-step?
First, connect your primary Eero to the modem via Ethernet. Download the Eero app on your phone and follow the on-screen instructions. Place additional Eero units around your home to extend coverage and complete the setup in the app.
Can I Use Eero Mesh Wifi With My Existing Router?
Yes, Eero can work with most existing routers in bridge mode. This disables the router’s wifi and lets Eero manage your network. Ensure your existing router supports bridge mode for smooth integration.
How Many Eero Units Do I Need For Full Coverage?
The number depends on your home size and layout. Generally, one Eero covers up to 1,500 square feet. Larger homes may require two or more units to ensure strong wifi throughout.
Conclusion
Setting up your Eero mesh WiFi is simple and quick. Follow the steps carefully to get strong internet everywhere. Place the Eero devices in good spots around your home. Use the app to check the connection and manage settings. Enjoy smooth and fast WiFi on all your devices.
A reliable network makes work, streaming, and browsing easier. Keep your system updated for the best performance. Now, your home can have better WiFi coverage with less hassle.