Are you struggling to get all your devices connected to your tri band router? You’re not alone.
With more devices than ever competing for a strong Wi-Fi signal, knowing how to connect each one properly can make a huge difference in your internet speed and reliability. Imagine streaming movies, playing games, or working from home without annoying drops or slowdowns.
This guide will show you exactly how to connect your devices to a tri band router step-by-step, so you can enjoy fast, stable internet everywhere in your home. Keep reading, and you’ll unlock the full power of your router in no time.

Credit: www.youtube.com
Tri Band Router Basics
Understanding the basics of a tri band router can change how you experience internet connectivity at home or work. These devices are designed to handle multiple connections smoothly, which means less waiting and more streaming, gaming, or working. Let’s break down what makes a tri band router different and why it might be the upgrade you need.
What Is A Tri Band Router
A tri band router broadcasts three separate wireless signals. Typically, it includes one 2.4 GHz band and two 5 GHz bands. Each band acts like its own lane on the internet highway, allowing more devices to connect without slowing down your network.
Think of it as having three different channels for your Wi-Fi devices to use at the same time. This design helps reduce traffic jams when many devices are online. Have you noticed your internet slowing down during a busy evening? A tri band router can help prevent that.
Benefits Of Tri Band Routers
- Improved Speed and Performance:More bands mean better distribution of devices, reducing interference and boosting overall speed.
- Better Support for Multiple Devices:Whether it’s phones, laptops, smart TVs, or gaming consoles, each device can connect to a less crowded band.
- Enhanced Streaming and Gaming Experience:With less lag and buffering, you can enjoy smoother video calls, HD streaming, and online gaming.
- Future-Proofing Your Network:As you add more smart devices to your home, a tri band router can handle the increased demand without a hitch.
I once switched to a tri band router in a busy household with multiple users and devices. The difference was clear—no more dropped calls or buffering during peak hours. How many devices do you have connected right now? If it’s more than five, a tri band router could be a game changer for your setup.
Credit: www.tp-link.com
Preparing Your Devices
Before you connect your devices to a tri band router, it’s essential to prepare them properly. This preparation helps ensure a smooth and fast connection without frustrating interruptions. Taking a moment to get your devices ready can save you time and improve your overall network experience.
Check Device Compatibility
Not every device supports tri band routers or their specific frequencies. Most tri band routers offer one 2.4 GHz band and two 5 GHz bands. Check your device’s Wi-Fi settings to see which bands it supports.
Older devices might only connect to the 2.4 GHz band, which is slower but has a longer range. Newer devices usually support 5 GHz, offering faster speeds but shorter range. Knowing this helps you decide which band your device should connect to for the best performance.
Update Device Software
Updating your device’s software can fix bugs and improve compatibility with your router. Manufacturers often release updates that enhance Wi-Fi performance or security. Ignoring updates might lead to connection drops or slower speeds.
Check for updates in your device’s settings before connecting to the router. This simple step can make a noticeable difference in how well your device interacts with your tri band network. Have you ever experienced sudden slowdowns that an update could have prevented?
Accessing Router Settings
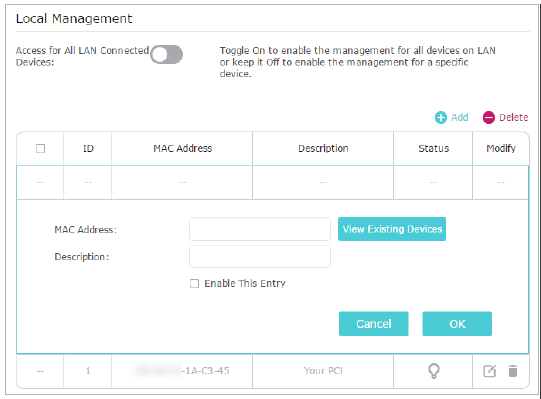
Accessing your tri band router settings is the first essential step to connect devices efficiently and customize your network. Without entering the router’s control panel, you can’t manage which devices connect or optimize the bands for better performance. Let’s walk through how to get to this control area quickly and securely.
Connect To Router Network
First, ensure your device—whether it’s a laptop, smartphone, or tablet—is connected to your router’s network. This can be done either via Wi-Fi or an Ethernet cable. If you are connecting over Wi-Fi, look for the network name (SSID) printed on the router or in the manual.
Keep in mind, tri band routers often broadcast multiple SSIDs—one for each band. Connecting to any of these networks will allow you to access the router, but for initial setup, the main SSID is usually best.
Login To Router Dashboard
Once connected, open a web browser and type your router’s IP address into the address bar. Common IPs include 192.168.1.1or 192.168.0.1, but you can find this on your router’s label or manual.
You will be prompted to enter a username and password. These are often set to defaults like admin/adminor admin/password. If you changed these credentials before, use your custom login details.
If you haven’t changed the default password, it’s a good idea to do so after logging in to protect your network. Wondering why you should do this right away? Default credentials are widely known, making your network vulnerable to unauthorized access.
Connecting Devices To Wi-fi
Connecting devices to Wi-Fi is simple with a tri-band router. Tri-band routers offer three separate wireless bands. This helps reduce interference and improve speed. Each device can connect to the best band for its needs. Follow the steps below to get your device online quickly and securely.
Select The Right Band
Tri-band routers usually provide one 2.4 GHz band and two 5 GHz bands. The 2.4 GHz band covers a larger area but is slower. The 5 GHz bands offer faster speeds but have a shorter range. Choose the 2.4 GHz band for devices far from the router. Pick the 5 GHz band for devices close to the router or those needing fast speeds.
Enter Network Credentials
Find your router’s Wi-Fi network name (SSID) in the device’s Wi-Fi settings. Select the correct SSID for the band you want. Enter the Wi-Fi password exactly as set on the router. Passwords are case-sensitive, so type carefully. Avoid spaces before or after the password. This step ensures your device connects securely to the network.
Verify Connection Status
After entering the password, check your device’s Wi-Fi icon. It should show a strong signal and connected status. Open a browser or app to test internet access. If connection fails, try re-entering the password or selecting another band. Restarting the device or router can also help solve connection issues.
Troubleshooting Connection Issues
Check that your device is within range and the router’s bands are active. Restart both devices to refresh the connection. Confirm the correct network name and password are used for each band.
Troubleshooting connection issues with your tri-band router can be a frustrating experience. But with a little patience and the right approach, you can quickly identify and resolve common problems. Whether you’re a tech enthusiast or a casual user, understanding the basics of troubleshooting can save you time and keep your devices running smoothly. Let’s dive into some practical solutions.Common Problems And Fixes
When devices fail to connect to your tri-band router, it could be due to several reasons. One common issue is interference from other wireless devices. To mitigate this, try moving your router to a central location in your home, away from walls and electronic devices. Another issue might be incorrect login credentials. Double-check that you’re entering the right password for your network. Sometimes, a simple typo can prevent devices from connecting. If you’re experiencing slow speeds, consider disconnecting devices that are not in use. Overloading the network with too many devices can lead to performance issues.Resetting The Router
Resetting your router can often resolve connection problems. To do this, locate the reset button on your router, usually found on the back or bottom. Press and hold the button for about 10 seconds. This will restore the router to its factory settings. Remember, you’ll need to set up your network again after a reset. Make sure you have your ISP details and any necessary credentials handy.Checking Firmware Updates
Firmware updates can improve your router’s performance and security. To check for updates, access your router’s admin panel through a web browser. Look for the firmware update section, which is often under the “Administration” or “Advanced” tab. If an update is available, follow the on-screen instructions to install it. Keeping your router’s firmware up to date ensures you have the latest features and fixes for any known issues. Are you regularly checking for updates? It’s a simple step that can make a big difference.
Credit: www.youtube.com
Optimizing Device Connections
Optimizing how your devices connect to a tri-band router can greatly improve your internet speed and reliability. Tri-band routers offer three separate wireless bands, which means you can spread your devices across these bands for better performance. Understanding how to assign devices, prioritize bandwidth, and use Quality of Service (QoS) settings will help you get the most out of your network.
Assigning Devices To Bands
Your tri-band router has one 2.4 GHz band and two 5 GHz bands. The 2.4 GHz band covers a larger area but has slower speeds, making it ideal for devices like smart home gadgets or older phones. Use the 5 GHz bands for devices that require faster speeds and less interference, such as gaming consoles, laptops, or streaming devices.
Think about where your devices are located. If a device is far from the router, placing it on the 2.4 GHz band might keep it connected without dropping. Closer devices can take advantage of the faster 5 GHz bands. Check your router’s admin panel to manually assign devices to specific bands and avoid overcrowding any single band.
Prioritizing Bandwidth
Not all devices need the same amount of bandwidth. For example, streaming a 4K video demands more than sending emails. By prioritizing bandwidth, you can ensure your important tasks don’t slow down.
You can identify high-demand devices and set limits on less critical ones. This balance helps prevent slowdowns during busy times. Ask yourself: which devices do you rely on most for work or entertainment?
Using Quality Of Service Settings
Quality of Service (QoS) settings let you control how your router manages traffic. This means you can prioritize certain activities like video calls or online gaming over others. QoS settings are especially useful if multiple users share your network at once.
Access your router’s settings to enable QoS and assign priority levels to specific devices or applications. You might give your work laptop higher priority during business hours, then shift priority to streaming devices in the evening. This flexibility keeps your network running smoothly, no matter what you’re doing.
Frequently Asked Questions
How Do I Connect Devices To A Tri Band Router?
To connect devices, first access the router’s Wi-Fi settings. Choose the desired band (2. 4GHz, 5GHz, or 6GHz). Enter the network password on your device. Once connected, your device will automatically switch bands for optimal speed and performance.
What Bands Are Available On A Tri Band Router?
A tri band router offers three bands: one 2. 4GHz band and two 5GHz bands. Some newer models include a 6GHz band instead. These bands help reduce network congestion and improve overall wireless performance for multiple devices.
Can I Connect All Devices To Any Band?
Yes, but device compatibility varies. Older devices often use the 2. 4GHz band. Newer devices support 5GHz or 6GHz bands, which offer faster speeds and less interference. Choose the band that matches your device’s capability for best performance.
Why Use A Tri Band Router For Multiple Devices?
Tri band routers handle more devices efficiently by distributing traffic across three bands. This reduces network congestion and provides better speed. It’s ideal for homes or offices with many connected devices needing reliable, high-speed internet access.
Conclusion
Connecting devices to a tri band router is simple and quick. Choose the right band for your device to get the best speed. Enter your network password carefully to stay secure. Keep your router updated to avoid connection problems. Enjoy faster internet and fewer interruptions with a tri band router.
This small effort improves your online experience every day. Ready to connect more devices? Just follow these easy steps again.