If you want to keep your home network safe, disabling WPS on your budget router is a smart move. WPS, or Wi-Fi Protected Setup, might seem convenient, but it can leave your connection open to hackers.
You might think only expensive routers have this risk, but even budget models can be vulnerable. In this guide, you’ll learn simple steps to turn off WPS and boost your Wi-Fi security without any technical hassle. Keep reading to take control of your network and protect your personal information.
Why Disable Wps
Understanding why you should disable WPS on your budget router is key to keeping your network secure and efficient. WPS, or Wi-Fi Protected Setup, was designed to make connecting devices easier, but it comes with hidden risks that could leave your network vulnerable. Let’s look closely at the security concerns and the practical benefits of turning off WPS.
Security Risks Of Wps
WPS uses a PIN system that can be easily guessed by attackers. This makes it a weak point that hackers often target to gain unauthorized access to your Wi-Fi.
Many budget routers have outdated firmware that doesn’t fix these vulnerabilities. If your router’s WPS is enabled, it’s like leaving a door unlocked in your digital home.
Have you ever wondered why some devices connect instantly but still make your network feel unsafe? That convenience comes at a cost—potential exposure to cyber threats.
Benefits Of Turning Off Wps
Disabling WPS immediately strengthens your network security by removing the easy entry point for hackers. This forces devices to connect using the more secure Wi-Fi password method.
You gain better control over who accesses your network. No more accidental connections or devices joining without your knowledge.
Turning off WPS also encourages regular password updates. This habit keeps your network safer over time and reduces the chance of long-term vulnerabilities.
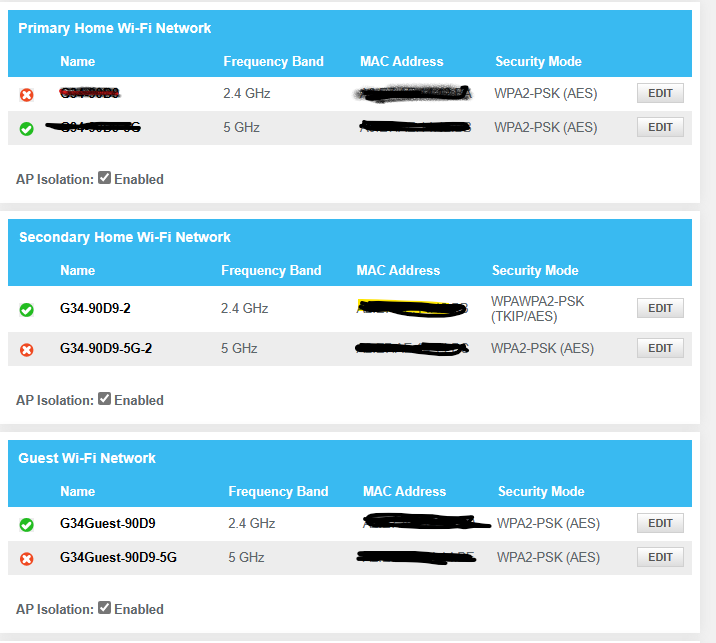
Credit: community.surfboard.com
Check Your Router Model
Before you can disable WPS on your budget router, you need to know exactly which model you’re working with. This is crucial because different models have different interfaces and options. Knowing your router model helps you find the right instructions and avoid unnecessary confusion.
Identifying Budget Routers
Budget routers often have simpler designs and fewer features than high-end models. They usually come from brands like TP-Link, Netgear, or D-Link. To identify your router, look for a label on the back or bottom of the device.
- Model Number:This is usually a combination of letters and numbers, such as “TL-WR841N” or “DIR-615”.
- Serial Number:Helps with warranty but less useful for settings.
- Brand Name:This confirms the manufacturer.
Noticing these details early prevents guesswork. Have you ever tried changing settings only to realize you had the wrong model information?
Accessing Router Details
If you can’t find the physical label, you can still check your router’s model through its web interface. Connect your device to the router’s Wi-Fi or use an Ethernet cable.
Open a browser and type the router’s IP address into the address bar. Common IPs are:
- 192.168.0.1
- 192.168.1.1
- 192.168.1.254
Log in using your username and password (often “admin” / “admin” by default). Once logged in, look for a section like “Device Info” or “Status”.
Here, you’ll find your router’s model number and firmware version. This info is key for finding the exact steps to disable WPS on your specific device. What’s your router’s model telling you about its capabilities?
Access Router Settings
Accessing your router settings is the key to managing features like WPS, especially on a budget router. Without entering the router’s control panel, you can’t make necessary security changes or customize your network. Here’s how to connect and log in smoothly.
Connecting To The Router
First, you need to connect your device to the router’s network. This can be done either via Wi-Fi or with an Ethernet cable for a more stable connection.
- If using Wi-Fi, look for the network name (SSID) on the back or bottom of your router.
- Enter the password provided with the router packaging or on the sticker.
- For Ethernet, plug one end of the cable into your computer and the other into any LAN port on the router.
Have you noticed how many people skip using Ethernet and then face login troubles? A wired connection often avoids timeout issues during setup.
Logging Into The Admin Panel
Once connected, open a web browser and enter the router’s IP address into the address bar. Common IPs include 192.168.0.1or 192.168.1.1, but check your router’s label or manual to be sure.
A login screen will appear asking for a username and password. Default credentials are usually “admin” for both fields, but if these don’t work, look for a sticker on your router or consult the manual.
- Change these default credentials if you haven’t already to keep your network secure.
- If you’ve forgotten your custom login, a factory reset on the router will restore defaults—but be prepared to set up your network again.
Have you ever tried to guess your router’s password multiple times? It can be frustrating, but patience here saves you from bigger security headaches later.
Credit: datafeature.com
Locate Wps Settings
Disabling WPS on a budget router can enhance your network security. However, finding the WPS settings can feel like searching for a needle in a haystack. This is especially true if you’re not familiar with the router’s interface. But don’t worry, you’re not alone in this. Let’s dive into how you can locate these elusive settings and take control of your network’s security.
Common Menu Names
Routers often have different menu names for the same settings, making the process confusing. Look for menu items like “Wireless Settings”, “Wi-Fi Setup”, or simply “WPS”. These are the usual suspects where WPS settings are hidden.
If your router uses a different language or technical jargon, consult the user manual. It might provide a hint about the menu name you need. Remember, sometimes the simplest names hold the most important settings.
Troubleshooting Missing Options
If you can’t find the WPS settings, don’t panic. It’s possible that the option is buried under advanced settings. Look for tabs or links like “Advanced”or “More Options”.
Consider updating your router’s firmware. An outdated version might not display the latest features or options. And if all else fails, reach out to the manufacturer’s support for guidance.
Have you ever spent hours searching for a setting only to find it in the most unexpected place? Share your experiences in the comments below. Your story might just help someone else!
Steps To Disable Wps
Disabling WPS on your budget router is a crucial step to enhance your network security. Many routers have this feature enabled by default, which can leave your Wi-Fi vulnerable to attacks. Let’s walk through the simple steps to turn off WPS and protect your connection.
Turning Off Wps Button
Start by logging into your router’s admin panel. This is usually done by typing the router’s IP address into your browser, often something like 192.168.1.1or 192.168.0.1. Once logged in, look for the wireless or security settings section.
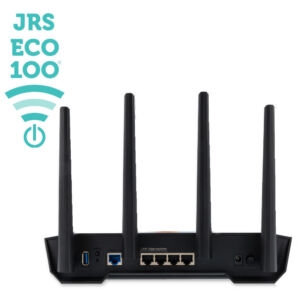
Here, you’ll find an option related to WPS. Some routers have a physical WPS button as well. If yours does, simply pressing and holding this button can disable the WPS function. If there’s no physical button, toggle the software setting to turn off WPS.
Disabling Pin Method
The WPS PIN method is another common vulnerability. Within the router’s settings, locate the WPS configuration area. You will see an option to disable the PIN method separately from the push-button method.
Make sure to uncheck or disable the WPS PIN option. This step is important because even if the button method is off, the PIN can still allow unauthorized access. Have you checked whether your router supports disabling these methods independently? It’s worth investigating to secure your network thoroughly.
Credit: www.jrseco.com
Save And Reboot Router
After disabling WPS on your budget router, saving the changes and rebooting the device is crucial to ensure the new settings take effect. Skipping this step might leave your router operating with the old settings, keeping WPS active. Let’s look at how to properly save your changes and restart the router for a secure connection.
Applying Changes
Once you’ve turned off WPS in the router’s settings, look for a button labeled “Save,” “Apply,” or something similar. Click it to lock in your new configuration. This action updates the router’s software with your changes immediately.
Sometimes the router interface might warn you that settings won’t apply until a reboot. Don’t ignore this message—it’s there to remind you that the router needs to restart to fully implement the update.
Restarting For Effect
After saving, perform a manual reboot if the router doesn’t do it automatically. Unplug the power cord, wait about 10 seconds, then plug it back in. This simple step refreshes the system and activates the new security settings.
Have you ever saved settings only to find the problem persisted? A fresh reboot often resolves such issues, making sure the router’s internal memory resets with your latest commands. Your router will run more smoothly, and you’ll feel more confident about your home network’s safety.
Verify Wps Is Disabled
After disabling WPS on your budget router, it’s crucial to confirm it’s truly off. This step ensures your network remains secure from unauthorized access. Verifying the WPS status enhances your router’s security and gives peace of mind. Follow these simple steps to ensure WPS is disabled.
Testing Connectivity
First, try connecting a device using WPS. Attempt to connect without entering a password. If the connection fails, WPS is likely disabled. This test is quick and straightforward.
Check your router’s admin panel for WPS settings. Log in using your router’s IP address in a web browser. Navigate to the WPS settings section. Ensure the WPS feature is set to ‘Off’ or ‘Disabled’. Confirm the settings are saved.
Using Online Tools
Online tools can verify your network’s security. Use a network scanner to check for WPS vulnerabilities. These tools often provide detailed security reports.
Ensure the tool shows no active WPS configuration. Many free tools online can assist with this check. Regularly scan your network for any changes or vulnerabilities.
Alternative Security Measures
After disabling WPS on your budget router, it’s crucial to strengthen your network with other security measures. WPS can be a weak link, but your Wi-Fi doesn’t have to stay vulnerable. Taking extra steps can protect your data and keep unwanted users out.
Strong Wi-fi Passwords
Your Wi-Fi password is the first line of defense. Use a long password combining letters, numbers, and special characters. Avoid easy-to-guess phrases like “password123” or your pet’s name.
Think about a password you wouldn’t share casually—even with friends. If you struggle to remember complex passwords, try using a trusted password manager. It’s a simple way to keep your network secure without the hassle.
Firmware Updates
Router manufacturers release firmware updates to fix security holes and improve performance. Ignoring these updates leaves your network exposed to hackers. Check your router’s settings regularly for update notifications.
Sometimes, updates happen automatically, but some budget routers require manual installation. It might feel like a hassle, but staying current reduces risks significantly. Would you leave a door unlocked just because it’s inconvenient to lock?
Frequently Asked Questions
What Is Wps And Why Disable It On Budget Routers?
WPS (Wi-Fi Protected Setup) simplifies connections but can be a security risk. Disabling it on budget routers prevents unauthorized access and enhances network safety.
How To Access Router Settings To Disable Wps?
Log into your router’s admin panel using its IP address. Navigate to the wireless or security settings tab to find and disable WPS.
Will Disabling Wps Affect My Wi-fi Connectivity?
No, disabling WPS won’t affect Wi-Fi performance. You’ll need to connect devices manually using your network’s password instead of the push-button method.
Is Disabling Wps Necessary For All Budget Routers?
It’s highly recommended for most budget routers, as WPS vulnerabilities can expose your network to attacks. Always check your router’s manual for specific advice.
Conclusion
Disabling WPS on a budget router helps keep your network safe. It stops easy access from outsiders. The steps are simple and quick to follow. Doing this protects your personal information better. Remember to check your router settings often. Stay aware of your network’s security status.
Taking small actions can prevent big problems later. Stay safe and enjoy a secure internet connection every day.