Are you tired of lag spikes and connection drops while gaming? Setting a static IP on your gaming modem can be the simple fix you need to boost your connection’s stability and speed.
By assigning a fixed address to your device, you gain better control over your network, reduce interruptions, and enjoy smoother gameplay. You’ll learn exactly how to set a static IP on your gaming modem—step by step, without any tech jargon.
Keep reading to take your gaming experience to the next level.
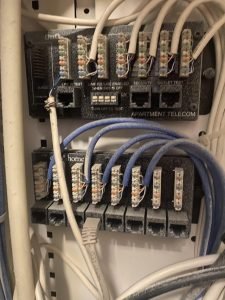
Credit: thepihut.com
Benefits Of Static Ip For Gaming
Setting a static IP for your gaming modem can change the way you experience online gaming. It offers several benefits that can enhance your gameplay and keep your connection reliable. Understanding these advantages helps you decide if it’s the right move for your setup.
Improved Connection Stability
A static IP address means your gaming device keeps the same address every time it connects to the network. This consistency prevents connection drops caused by IP conflicts or changes. You’ll notice fewer interruptions during long gaming sessions, which keeps your focus on the game rather than troubleshooting network issues.
Reduced Lag And Ping Spikes
With a static IP, your router can better manage traffic and prioritize your gaming packets. This often leads to smoother gameplay with lower lag and fewer ping spikes. Imagine playing a competitive match where your connection doesn’t suddenly spike—how much more confident would you feel?
Easier Port Forwarding
Port forwarding becomes straightforward with a static IP because the address you forward ports to never changes. This makes setting up games or servers simpler and reduces the need to constantly update settings. If you host multiplayer games or run a game server, this can save you a lot of time and frustration.

Credit: www.atomic.co.za
Preparing For Static Ip Setup
Setting a static IP on your gaming modem isn’t just about typing in numbers. Preparation plays a huge role in avoiding headaches later on. Taking a moment to organize your information and secure your current settings can save you from frustrating downtime or connectivity issues.
Gathering Network Information
Before you dive into the modem settings, make sure you have all the necessary network details at hand. This includes your current IP address, subnet mask, default gateway, and DNS server addresses. You can find these by running a simple command prompt query like ipconfig /allon Windows or checking network preferences on macOS.
Knowing your ISP’s IP range can also prevent conflicts. Have you ever tried to set an IP only to find it clashes with another device? Gathering this info upfront helps you avoid that.
Accessing Modem Settings
Accessing your modem’s control panel is the next key step. Usually, you’ll enter your modem’s IP address into a web browser—common ones are 192.168.0.1or 192.168.1.1. If you’re unsure, check the label on your modem or the user manual.
Keep your login credentials ready. If you haven’t changed them, the default username and password might be something like “admin” and “password.” Changing these after setup is a good security habit.
Backing Up Current Configuration
Before making any changes, back up your current modem configuration. This step often gets overlooked but can be a lifesaver. If something goes wrong, restoring your original settings is just a click away.
Many modems offer an export or backup option inside the settings menu. Save this file somewhere safe on your computer or external drive. Trust me, having this backup removed the stress when I accidentally locked myself out during a previous setup attempt.
Assigning A Static Ip On Your Modem
Assigning a static IP on your modem ensures your gaming device always uses the same network address. This helps reduce lag and connection drops during gaming sessions. Setting a static IP also simplifies port forwarding and network management for your device. Follow these steps to assign a static IP on your gaming modem.
Locating The Dhcp Reservation Section
Access your modem’s admin panel by entering its IP in your browser. Login using your username and password. Find the DHCP settings or LAN setup section. Look for “DHCP Reservation” or “Address Reservation” options. This section allows you to assign fixed IPs to specific devices on your network.
Entering Device Mac Address
Find the MAC address of your gaming device. It is a unique identifier for your device’s network adapter. You can usually find it in the device’s network settings or on a label. In the DHCP reservation section, enter this MAC address carefully. This links the device to the static IP you will assign next.
Setting The Desired Ip Address
Choose an IP address within your modem’s range but outside the DHCP automatic pool. This prevents IP conflicts with other devices. Enter the chosen IP address beside the MAC address you added. Save the settings and restart your modem or device. Your gaming device will now use the assigned static IP every time it connects.

Credit: www.reddit.com
Configuring Gaming Devices
Configuring your gaming devices to use a static IP address can significantly improve your online gaming experience. By assigning a fixed IP, you reduce connection drops and make port forwarding simpler, which many games require for smooth multiplayer sessions. Let’s break down how you can set this up on different types of gaming devices.
Setting Static Ip On Pc
On a PC, setting a static IP involves accessing your network settings. Open the Control Panel or Settings app and navigate to the network adapter properties. Here, you’ll find the option to manually input your IP address, subnet mask, gateway, and DNS servers.
Choose an IP address that fits within your router’s range but is outside its DHCP allocation to avoid conflicts. For example, if your DHCP range is 192.168.1.100 to 192.168.1.200, pick something like 192.168.1.50. This keeps your PC’s IP constant and stable during gaming sessions.
Setting Static Ip On Consoles
Consoles like Xbox and PlayStation also support static IP assignments, though the interface varies. Head to the network settings on your console and select the manual or static IP option. You’ll need to enter the IP address along with subnet mask, gateway, and DNS details similar to a PC.
Check your router’s device list to grab the current IP of your console and use that as a base to set your static IP. This ensures your console stays connected to your gaming modem without interruption. Have you noticed lag spikes during multiplayer? Assigning a static IP on your console might be the fix.
Verifying Ip Assignment
After setting a static IP, confirming the assignment is crucial. On PCs, use the command prompt to run ipconfigand check if the displayed IP matches what you set. For consoles, test the network status in settings to ensure the IP is correct and connected.
Additionally, reboot your modem and devices to refresh connections. If your device fails to connect, double-check the IP details and ensure no other device uses the same address. This simple verification can save hours of troubleshooting later.
Troubleshooting Common Issues
Setting a static IP on your gaming modem can boost your connection stability and reduce lag, but sometimes issues pop up. Troubleshooting these problems quickly helps you get back to smooth gameplay without frustration. Let’s look at some common hurdles and how you can fix them efficiently.
Ip Address Conflicts
IP address conflicts happen when two devices on your network share the same static IP. This causes connection drops or intermittent issues that can be annoying during online gaming sessions.
To avoid conflicts, check your modem’s IP range and assign a static IP outside the DHCP pool. For example, if your modem assigns IPs from 192.168.1.2 to 192.168.1.100, choose an address like 192.168.1.150 for your gaming device.
Have you ever struggled with sudden disconnections just as you were about to win a game? That might be an IP conflict silently causing trouble.
Connectivity Problems
Sometimes, even with a static IP set, your gaming device might fail to connect to the internet or the gaming server. This often results from incorrect subnet masks, gateway, or DNS settings.
Double-check these details in your modem’s configuration page. The subnet mask is usually 255.255.255.0, and the default gateway should match your modem’s IP address.
Also, try using well-known DNS servers like Google’s (8.8.8.8 and 8.8.4.4) to improve connection reliability. Are you sure your DNS settings aren’t causing unnecessary delays?
Resetting Modem Settings
If nothing else works, resetting your modem to factory defaults can clear misconfigurations. Keep in mind this will erase all your custom settings, including your static IP setup.
After resetting, log back into your modem and carefully re-enter the static IP details. Save the changes and reboot your modem to apply the settings.
Remember, a fresh start can often fix hidden glitches. Have you tried resetting your modem before blaming your internet provider?
Tips For Optimizing Gaming Network
Optimizing your gaming network is just as important as setting a static IP on your gaming modem. A smooth, lag-free connection can make all the difference in your gaming experience. Here are some practical tips to keep your network running at its best.
Using Quality Of Service (qos)
Quality of Service (QoS) lets you prioritize gaming traffic over other types of data on your network. This means your game packets get the fastest route and least delay, even if others in your home are streaming videos or downloading files.
To set this up, access your modem’s settings and look for QoS options. Assign a higher priority to your gaming device’s IP address or MAC address. This small tweak can reduce lag and keep your gameplay smooth.
Updating Firmware
Keeping your modem’s firmware updated is often overlooked but crucial. Firmware updates fix bugs, improve security, and sometimes add features that enhance performance.
Check your modem manufacturer’s website or admin panel regularly. Updating firmware can feel like a hassle, but it’s a quick step that can prevent frustrating network issues down the line.
Regular Network Maintenance
Just like you clean your gaming setup, your network needs regular maintenance. Restart your modem and router every few weeks to clear memory and refresh connections.
Also, monitor connected devices and disconnect any that aren’t in use. Too many devices hogging bandwidth can slow your gaming experience without you realizing it.
Have you noticed your ping spike during certain hours? Regular checks might help you spot patterns and fix congestion before it ruins your game night.
Frequently Asked Questions
What Is A Static Ip And Why Use It On Gaming Modems?
A static IP is a fixed address assigned to your device. It ensures a stable connection and improves online gaming performance by reducing lag and connection drops.
How Do I Assign A Static Ip On My Gaming Modem?
Access your modem’s settings via its IP address. Locate the LAN or DHCP settings, then assign a fixed IP to your device’s MAC address.
Does Setting A Static Ip Improve Gaming Speed?
A static IP stabilizes your connection, reducing interruptions. While it doesn’t increase raw speed, it enhances consistency and lowers latency for smoother gameplay.
Can I Use Any Ip Address For My Gaming Modem?
Use an IP within your modem’s subnet range. Avoid addresses assigned by DHCP to prevent conflicts. Check your modem’s documentation for correct ranges.
Conclusion
Setting a static IP on your gaming modem enhances online stability. It reduces lag and minimizes disconnections during gameplay. Follow the steps carefully to configure your modem correctly. A static IP ensures a smoother gaming experience. Remember, each modem may have different settings.
Refer to your modem’s manual for specific instructions. Now, enjoy uninterrupted gaming sessions with friends. Consistent internet connection makes a big difference. No more unexpected interruptions. Static IP is a reliable choice for gamers. Keep your gaming sessions seamless and hassle-free.
Your gaming world awaits.