Are you tired of weak WiFi signals in the far corners of your home or office? A long range WiFi extender can be the perfect solution to boost your connection where you need it most.
But setting it up doesn’t have to be confusing or time-consuming. In this guide, you’ll learn exactly how to configure your long range WiFi extender manually, step by step. By the end, you’ll enjoy stronger, faster internet without dead zones holding you back.
Ready to take control of your WiFi and get the coverage you deserve? Let’s dive in.
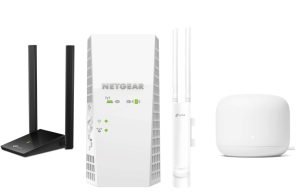
Choosing The Right Wifi Extender
Wifi extenders help boost your network signal over long distances. There are different types of wifi extendersto choose from:
- Repeater:Copies your wifi signal to extend coverage.
- Access Point:Connects to your router with cables for better reach.
- Mesh Extender:Works with mesh systems for seamless wifi.
Key features for long range include high gain antennasand dual-band support. These improve signal strength and reduce interference.
Compatibility with your router is important. Check if the extender supports the same wifi standards(like 802.11ac or 802.11n). This ensures smooth connection and easy setup.
Credit: www.tp-link.com
Preparing For Manual Setup
Gather a wifi extender, a power source, and a device like a laptop or smartphone. Have your wifi network nameand passwordready. Make sure the device can connect to your current wifi.
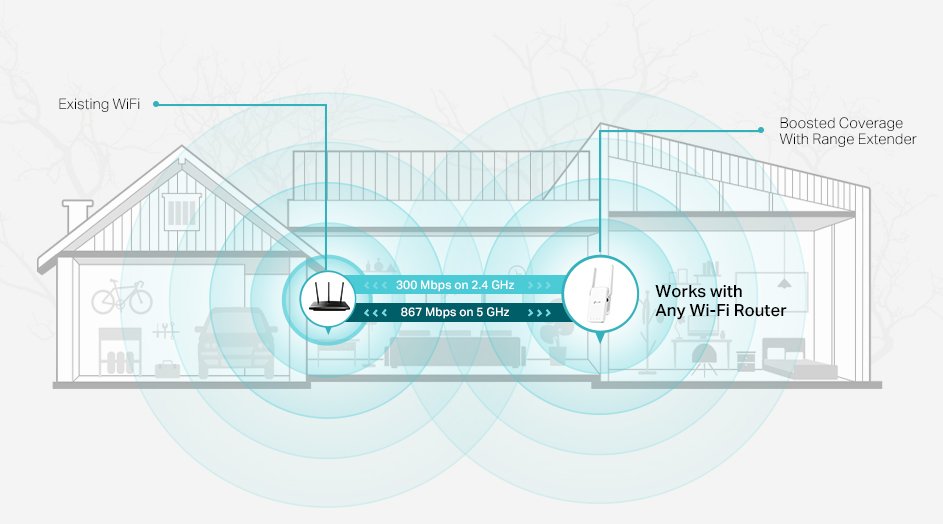
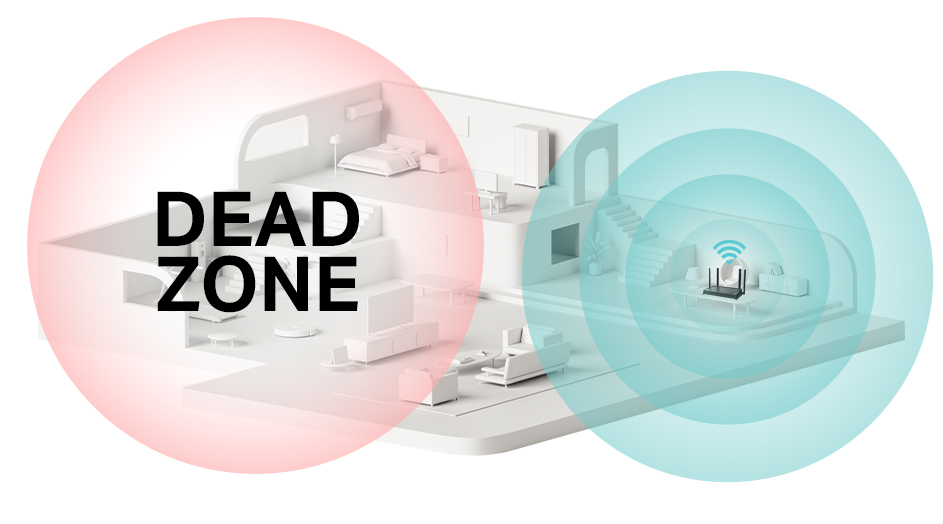
Place the extender where the current wifi signal is still strong but near the area needing coverage. Avoid walls or metal objects that block signals. A spot halfway between your router and dead zone works best.
| Network Detail | Why It Matters |
|---|---|
| SSID (Network Name) | Needed to connect extender to your wifi |
| Password | Secures your network and extender connection |
| WiFi Band (2.4 GHz or 5 GHz) | Select the right band for better range or speed |
Connecting To The Extender
Plug the long range WiFi extender into a power outlet. Wait for the power LED to light up. This means the device is on and ready.
Use a phone, tablet, or laptop to connect to the extender’s WiFi network. The network name (SSID) is usually printed on the device or in the manual.
Open a web browser and enter the extender’s IP address or setup URL. This address is often found in the instructions or on the device label.
A login page will appear. Enter the default username and password, often “admin” for both. This information is in the manual or on a sticker.
Once logged in, you can start configuring the extender to boost your WiFi signal over long distances.
Configuring Network Settings
Choose the source networkthat your WiFi extender will connect to. This network is usually your main router’s WiFi. Select the correct SSIDfrom the list of available networks shown on the extender’s setup page.
Set the SSID and passwordfor the extended network. You can use the same name as your main network or create a new one. Make sure the password is strong and easy to remember.
| Frequency Band | Use Case | Notes |
|---|---|---|
| 2.4 GHz | Longer range, slower speed | Works well through walls |
| 5 GHz | Faster speed, shorter range | Better for open spaces |
Pick the right frequency bandbased on your needs. For better coverage, 2.4 GHz is best. For faster speed, choose 5 GHz.
Optimizing Extender Performance
Adjust the channel settingsto reduce interference. Choose a channel with less traffic. This helps the extender work better. Use the router’s interface to find the best channel. Channels 1, 6, and 11 are often good choices.
Enable security featuresto protect your network. Use WPA2 or WPA3 encryption for strong security. Set a strong passwordto stop unauthorized access. Keep your extender’s firmware updated to fix security issues.
Test the signal strengthafter setup. Move the extender to different spots for the best coverage. Use apps or built-in tools to check signal bars. Place the extender where the signal is strong but still covers far areas.

Credit: m.youtube.com
Troubleshooting Common Issues
Connection problemsoften happen due to weak signals or wrong settings. Place the extender closer to the main router to get a better signal. Check the extender’s network name and password. Make sure they match the main WiFi network. Restart both the router and extender to refresh the connection. Sometimes, resetting the extender to factory settings fixes these issues.
Slow speedscan result from interference or too many devices connected. Keep the extender away from walls, metal objects, and microwaves. Limit the number of devices using the extender at the same time. Use the 5GHz band if available, as it is faster and less crowded than 2.4GHz.
Firmware updatesimprove performance and fix bugs. Check the manufacturer’s website for the latest firmware. Download and install updates carefully. Always follow the instructions to avoid damaging the device. Updating firmware can solve many connection and speed problems.
Maintaining Your Wifi Extender
Regular reboots help keep your wifi extender running smoothly. Restart it once a week to clear memory and fix small issues. This simple step can improve performance and reduce slowdowns.
Monitoring network traffic lets you see which devices use the most data. Check the extender’s admin page to find this info. It helps spot unusual activity or heavy users that slow the network.
Periodic firmware checks are essential. Firmware updates fix bugs and add features. Visit the manufacturer’s website or use the extender’s update tool to check for new versions. Keeping firmware updated ensures better security and stability.

Credit: www.youtube.com
Frequently Asked Questions
How Do I Manually Configure A Long Range Wifi Extender?
To manually configure, connect to the extender’s network first. Access its web interface via IP address. Enter your main WiFi credentials and set extender settings. Save changes and reboot. Position the extender midway between router and coverage area for best range.
What Is The Best Placement For A Long Range Wifi Extender?
Place your extender halfway between your router and the weak WiFi zone. Avoid walls and obstacles that block signals. Higher locations often improve coverage. Proper placement ensures stronger, more reliable extended WiFi signals throughout your space.
How Can I Improve Wifi Extender Signal Strength Manually?
Use manual channel selection in extender settings to avoid interference. Choose less crowded WiFi channels. Adjust antenna direction if available. Keep the extender away from electronics that cause interference. These steps boost your extender’s signal strength and stability.
Why Isn’t My Wifi Extender Connecting To The Router?
Check if you entered the correct WiFi network name and password. Ensure the extender is within router’s range during setup. Restart both router and extender to fix temporary issues. Firmware updates might also resolve connection problems.
Conclusion
Configuring a long-range WiFi extender manually can seem daunting. But with patience, it’s manageable. Follow each step carefully. Double-check the settings for accuracy. This ensures a stable connection. Remember, a good WiFi extender boosts your network. It covers more areas in your home or office.
This improves your internet experience. Troubleshooting may be needed sometimes. Stay calm and solve issues one by one. Practice helps in mastering the setup process. With time, configuring extenders becomes simpler. Enjoy a seamless internet connection with your newly configured WiFi extender.
Happy browsing!