Are you struggling to get strong WiFi signals outside your home? Setting up an outdoor WiFi extender can solve this problem, but what if your device doesn’t support WPS?
Don’t worry—you can still boost your connection without the hassle of pressing buttons or dealing with complicated setups. In this guide, you’ll learn simple, step-by-step methods to set up your outdoor WiFi extender without using WPS. Keep reading, and you’ll enjoy faster, more reliable internet wherever you need it.

Credit: www.youtube.com
Choosing The Right Outdoor Wifi Extender
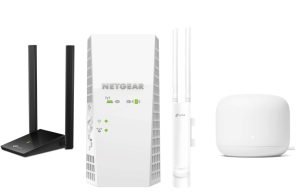
Choosing the right outdoor WiFi extender is key for strong signals. Weatherproofingensures the device works well in rain, snow, or sun. Look for durable materialsthat resist rust and damage. The extender should handle outdoor conditions without breaking.
Check if the extender is compatiblewith your current router. Not all devices work together. Some extenders only support certain brands or WiFi standards. Matching the frequency bands(2.4 GHz or 5 GHz) is also important.
| Feature | Why It Matters |
|---|---|
| Weatherproofing | Protects against rain, sun, and snow |
| Durability | Prevents damage and extends lifespan |
| Compatibility | Ensures proper connection with router |
| Frequency Bands | Matches your router for better speed |

Credit: www.youtube.com
Preparing For Installation
Choosing the best locationfor your outdoor WiFi extender is key. Find a spot close to your main routerbut still outside. Avoid walls and objects that block signals. High places like walls or poles work well.
Gather the right toolsbefore starting. You will need:
- A screwdriver
- Ethernet cables
- A ladder (if needed)
- The extender’s user manual
Check your network to make sure it supports the extender. Confirm your router’s IP address and password. Know your WiFi frequency band (2.4 GHz or 5 GHz). Ensure your internet plan can handle extra devices without slowdowns.
Connecting Without Wps
To connect the outdoor WiFi extender without WPS, first access the extender’s web interface. Connect your device to the extender’s default WiFi network. Open a web browser and enter the extender’s IP address, usually found on the device label or manual.
Next, set up a manual connection. In the web interface, select your home WiFi network from the list of available networks. Enter the WiFi password carefully to avoid errors. This allows the extender to connect to your main router.
Configure the SSID and password for your extender. You can keep the same name and password as your main WiFi or create a new one. Use a strong password to keep your network secure. Save settings and wait for the extender to reboot.

Credit: www.youtube.com
Optimizing Performance
Adjust the antenna positionto get the best signal. Point antennas towards the area where you want coverage. Avoid placing antennas near metal objects or thick walls. Small changes in angle can improve signal strength a lot.
Avoid signal interferenceby moving the extender away from devices like microwaves, cordless phones, and Bluetooth gadgets. These can cause the WiFi to become weak or unstable. Keep the extender at a good distance from these devices.
Test the signal strengthafter adjusting. Use a smartphone or laptop to check the WiFi bars. Walk around the area to find spots with weak signals. Move the extender or antennas until the signal is strong and steady everywhere needed.
Troubleshooting Common Issues
Resetting the extendercan fix many common problems. Find the reset button, usually a small hole. Use a paperclip to press and hold it for 10 seconds. The device will restart and restore factory settings. This clears old settings that may cause issues.
Firmware updateskeep your extender working well. Visit the manufacturer’s website to download the latest software. Follow instructions to install updates safely. Updated firmware improves performance and security.
Dealing with connection dropsoften needs checking the extender’s location. Place it closer to the main router but not too close. Avoid walls or metal objects that block signals. Restart the extender and router if the problem continues.
Maintaining Your Outdoor Wifi Extender
Dust and dirt can block signals. Clean the extender gently with a soft cloth. Avoid water or harsh chemicals. Check for leaves or debris around the device. Clear any obstruction to keep the signal strong.
Extreme weather may harm your extender. Inspect it each season. Look for rust, cracks, or loose parts. Tighten screws and replace damaged parts quickly. Cover or move the extender during storms or heavy snow.
- Change default passwords to strong, unique ones.
- Update the extender’s firmware regularly for safety.
- Turn off the extender when not in use to save power and reduce risk.
- Limit device connections to avoid overload and slow speeds.
Frequently Asked Questions
How Do I Connect An Outdoor Wifi Extender Without Wps?
To connect without WPS, use the extender’s web interface. Access it via a browser, enter the extender’s IP address, and follow setup instructions. Manually select your WiFi network and enter the password to establish a secure connection.
Can I Setup Outdoor Wifi Extender Using Ip Address?
Yes, you can. Connect to the extender’s network, open a browser, and enter its default IP address. This opens the setup page where you configure settings, select your WiFi, and enter credentials to extend your network outdoors.
What Are The Steps To Configure Wifi Extender Manually?
First, connect to the extender’s default network. Open a browser and enter the extender’s IP address. Log in, select your main WiFi, enter the password, and save. The extender will then repeat your WiFi signal without using WPS.
Is A Password Required To Setup Wifi Extender Without Wps?
Yes, a password is essential. Without WPS, you must manually enter your WiFi network’s password in the extender’s setup page. This ensures a secure connection and proper network extension outdoors.
Conclusion
Setting up an outdoor WiFi extender without WPS is simple. Follow the steps carefully for a smooth setup. First, connect the extender to your router using an Ethernet cable. Then, access the extender’s settings through a web browser. Configure the extender to match your network.
Place it in a spot with good signal strength. Test the connection to ensure it works. Now, enjoy extended WiFi coverage outdoors. Troubleshoot if any issues arise. With these steps, anyone can boost their outdoor WiFi. Stay connected effortlessly and enjoy browsing outside.