Are you wondering if your budget router can be wall mounted to save space and improve your Wi-Fi signal? You’re not alone.
Many people ask this question because mounting a router on the wall can make your setup cleaner and boost performance. But is it really possible with a budget router? You’ll discover the truth about wall mounting affordable routers, what you need to know before doing it, and simple tips to get the best results.
Keep reading to find out how you can make your router work better for you without spending extra money.
Budget Router Basics
Budget routers offer essential internet connectivity without extra costs. They serve homes and small offices well. Understanding their basics helps decide if wall mounting fits your needs. These routers focus on simplicity and affordability while providing reliable performance.
Common Features
- Basic Wi-Fi standards like 802.11n or 802.11ac
- One or two external antennas
- Limited Ethernet ports, usually 2 to 4
- Simple setup via web or app interfaces
- Standard security options like WPA2 encryption
- Modest range and speed suitable for small spaces
Typical Designs
Budget routers often have compact, lightweight bodies. They come in boxy or rounded shapes. Most models include small feet to sit on desks or shelves. Some have slots or holes for wall mounting, but not all.
Ports and antennas are usually placed on the back or sides. This layout affects how easily you can mount the router on walls. The plastic casing is often simple and not designed for heavy loads.
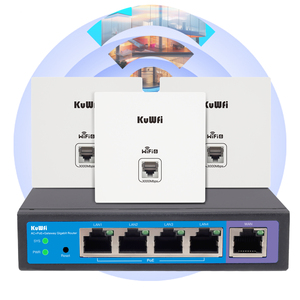
Credit: www.alibaba.com
Wall Mounting Feasibility
Wall mounting budget routers can save space and improve home network setup. Yet, not all routers fit well on walls. The feasibility depends on several factors like design and airflow needs. Understanding these helps decide if your router can be mounted safely and effectively.
Physical Compatibility
Most budget routers are designed for desktop use. Check the back or bottom of the router for mounting holes or slots. These holes allow secure attachment to screws on a wall.
If mounting points are missing, use alternative solutions like adhesive strips or custom brackets. Make sure the router stays firmly in place and does not fall.
Also, consider the router’s size and weight. Larger routers may need stronger support. The router’s shape should allow easy cable connection when mounted.
Ventilation Considerations
Routers generate heat during operation. Proper ventilation prevents overheating and maintains performance. Wall mounting must not block air vents or fans.
Place the router in an open space on the wall. Avoid enclosed cabinets or tight corners. Leave a few inches of space around the router for airflow.
Check for vents on the router’s sides, bottom, or back. Keep these areas clear of dust and obstructions. Overheating can shorten router life and reduce speed.
Tools Needed For Mounting
Mounting a budget router on the wall needs the right tools. These tools make the process easier and ensure the router stays secure. Having the essential hardware is a must. Optional accessories can help improve the setup or protect the device.
Essential Hardware
- Wall anchors to hold screws firmly in drywall
- Screws that fit the router’s mounting holes
- A drill or screwdriver for making holes and fixing screws
- A level to keep the router straight on the wall
- A pencil to mark spots where holes will go
Optional Accessories
- Cable clips to organize and secure wires
- Rubber pads to protect the wall and reduce vibration
- Double-sided mounting tape for extra hold or temporary fixes
- A stud finder to locate strong spots in the wall
Step-by-step Mounting Guide
Mounting your budget router on the wall can save space and improve its performance by offering better signal coverage. This guide will walk you through the process, ensuring your router is securely and efficiently mounted. Whether you’re a tech novice or have some DIY experience, these steps are simple to follow and will have your router up in no time.
Choosing The Right Spot
Finding the ideal location for your router is crucial for optimal performance. Consider placing it centrally in your home to ensure even coverage. Avoid areas with thick walls or electronic devices that may interfere with the signal. Think about the height, too. Mounting the router higher up can help disperse the signal better, reducing dead zones. Identify a spot that balances accessibility with effectiveness.
Marking And Drilling
Once you’ve chosen the perfect spot, it’s time to prepare for mounting. Use a pencil to mark the screw positions on the wall. Most routers come with mounting templates; if yours doesn’t, measure the distance between the mounting holes. Before drilling, double-check the alignment to avoid any mishaps. Use an appropriate drill bit for your wall type, whether it’s drywall, brick, or concrete. Safety goggles are a good idea to protect your eyes from dust.
Securing The Router
With holes drilled, insert wall anchors if needed, ensuring they’re flush with the wall. Screw in the screws, leaving a small gap to accommodate the router’s mounting brackets. Slide the router onto the screws, ensuring it’s firmly secured. Give it a gentle tug to confirm it’s stable. Now, connect the power and Ethernet cables, and you’re ready to enjoy an improved internet experience.
Mounting your router doesn’t just tidy up your space; it can enhance signal strength. Have you thought about the benefits a simple change in location could bring to your internet connectivity?
Cable Management Tips
Managing cables effectively is crucial when wall mounting budget routers. Neat cable management not only improves the appearance but also enhances the router’s performance and longevity. Here are some practical tips to keep your wires tidy and reduce potential issues.
Organizing Wires
Start by grouping cables based on their function—power cords separate from Ethernet cables. Use cable clips or adhesive-backed hooks to guide wires along the wall, keeping them secure and out of sight.
Label each cable with simple tags to avoid confusion during troubleshooting or upgrades. Velcro straps are a great choice to bundle cables without damaging them, allowing easy adjustments later.
Avoiding Signal Interference
Keep your router’s power adapter and Ethernet cables away from other electronic devices to reduce interference. Thick walls or metal objects can block signals, so position cables to minimize obstacles.
Consider using shielded Ethernet cables if you notice frequent connection drops. This small change can significantly enhance your router’s signal quality and overall network stability.

Credit: www.reddit.com
Common Issues And Fixes
Mounting a budget router on the wall can save space and improve coverage, but it often brings some challenges. Understanding common issues that arise and knowing how to fix them can keep your network running smoothly. Let’s look at two main problems you might face and how to handle them effectively.
Signal Loss Problems
Signal loss is a frequent complaint when routers are wall mounted. Walls, especially thick or metal-reinforced ones, can block Wi-Fi signals, reducing your internet speed and range.
To fix this, try these tips:
- Choose the right wall:Mount the router on an interior wall or one facing the main usage area. Avoid placing it behind large appliances or inside cabinets.
- Adjust the antenna:Position antennas vertically or horizontally based on your space layout. Small changes can boost signal strength.
- Use Wi-Fi extenders:If coverage is weak in certain spots, adding an extender can fill the gaps.
I once mounted a budget router in my home office, but the signal dropped drastically in the living room. Moving the router just a few feet to a more central wall solved the problem. Have you checked your router’s placement recently?
Overheating Risks
Budget routers often have limited ventilation, and wall mounting can block air flow. Overheating can cause slow performance or even hardware failure over time.
Watch out for these signs:
- Router feels hot to the touch after a few hours of use.
- Frequent disconnections or slow internet speeds.
To prevent overheating, consider:
- Mounting the router away from direct sunlight or heat sources.
- Leaving enough space around the device for air circulation.
- Using a small fan or cooling pad if the router tends to get very hot.
When I ignored overheating, my router started dropping connections randomly. Adding just a few inches of clearance and moving it out of the sun made a noticeable difference. Could your router benefit from better airflow?
Alternatives To Wall Mounting
Not all budget routers are designed for wall mounting. Many users seek easy and practical ways to place their routers for better signal strength and space management. Alternatives to wall mounting offer flexible options that can fit different home setups. These options keep the router safe, visible, and functional without drilling holes or using extra tools.
Shelf Placement
Placing a router on a shelf is simple and effective. Shelves provide a stable surface away from the floor. This height helps the signal travel better across rooms. Choose a shelf that is open, not enclosed, to avoid blocking the signal. Keep the router away from metal objects or thick walls. This reduces interference and improves connection speed.
Shelves are easy to access for adjustments or resets. They also keep cables organized and out of the way. Using a shelf saves space on desks and counters. It is a low-cost solution that works well for most homes.
Router Stands
Router stands offer another neat way to position budget routers. These stands lift the router off flat surfaces. This small elevation helps with cooling and airflow. Better airflow prevents overheating and maintains router performance. Router stands come in various shapes and sizes. Some have built-in cable management features to reduce clutter.
Stands are portable and can be moved to find the best signal spot. They often add style and organization to your network area. Many stands are affordable and easy to install without tools. This makes them a practical choice for non-wall-mounted setups.

Credit: gizmodo.com
Frequently Asked Questions
Can Budget Routers Be Mounted On A Wall?
Yes, many budget routers support wall mounting. Check for keyhole slots or mounting brackets on the router’s back.
Do Wall-mounted Routers Affect Wi-fi Signal Strength?
Wall mounting can improve signal distribution by elevating the router. Avoid metal surfaces and obstructions for best results.
What Tools Are Needed To Mount A Budget Router?
You typically need screws, anchors, a drill, and a screwdriver. Use the router’s mounting holes for secure installation.
Are All Budget Routers Designed For Wall Mounting?
No, not all budget routers have wall-mount features. Verify the model’s specifications before attempting to mount it.
Conclusion
Budget routers can often be wall mounted with simple steps. Doing this saves space and helps keep cables tidy. Most models have slots or holes for easy mounting. Just check the router’s design before buying. Wall mounting may improve signal strength by raising the device.
It also keeps the router safe from spills or damage. Choose a good spot with proper ventilation and power access. With a little care, budget routers work well on walls. This can make your home network neater and more efficient.